Hey there, green thumbs! 🌱 If you’ve been fortunate enough to have a bay tree in your garden or stumbled upon fresh bay leaves at the market, you know the incredible aroma and flavor they bring to your dishes. But how do you keep that freshness alive? Let’s dive in!

1. Why Fresh Bay Leaves Are a Game-Changer
Fresh bay leaves are vastly superior to their dried counterparts. They offer a more vibrant aroma and a nuanced flavor profile that can elevate any dish. But, like all fresh herbs, they need a little love to stay at their best.
2. Immediate Storage: From Garden to Kitchen
- A Quick Rinse: Gently wash the leaves under cold water to remove any dust or insects. Pat them dry with a soft cloth or paper towel.
- Air-Drying: If you’re not in a rush, let them air dry for a few hours. This will reduce any moisture that could lead to mold.
3. For Short-Term Use: The Refrigerator Method
- Paper Towel Magic: Wrap your fresh bay leaves in a slightly damp paper towel. This helps maintain the right moisture level.
- Seal Them Up: Place the wrapped leaves in a resealable plastic bag or airtight container. Store them in the vegetable crisper section of your fridge. They’ll stay fresh for about 1-2 weeks.
4. For Long-Term Storage: The Freezing Technique
- Prep Work: After rinsing and drying, spread the leaves out on a baking sheet. Pop them in the freezer for a couple of hours.
- Bag Them Up: Transfer the flash-frozen leaves into freezer bags. Remove as much air as possible and seal. This method retains flavor and aroma for up to 6 months.
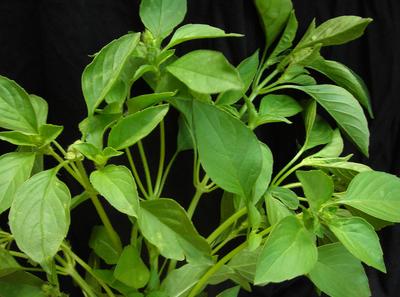
Related article: How to Store and Preserve Lemon Basil
5. Going Natural: The Air-Drying Technique
For those who love the old-school charm of naturally dried herbs such as myself, this method is for you! Drying bay leaves in open air not only preserves their aromatic essence but also extends their shelf life considerably.
- Clean Them Up: Begin by washing the fresh bay leaves gently under cold water. Pat them dry completely using a soft cloth or paper towel. This step is crucial because any lingering moisture can hinder the drying process.
- Lay Them Out: Spread the leaves out in a single layer on a tray or wire rack. Ensure they are not overlapping, as this can trap moisture and prevent even drying.
- Perfect Spot: Choose a warm, dry area with good air circulation. A shaded spot is ideal, as direct sunlight can bleach the leaves, diminishing their vibrant color and flavor.
- Patience is Key: Depending on the humidity in your area, it can take anywhere from a few days to two weeks for the bay leaves to dry thoroughly. They’re ready when they feel crisp to the touch.
- Storage: Once dried, store the bay leaves in an airtight container. Keep them in a cool, dark place, away from direct sunlight. Properly dried bay leaves can last for up to a year while retaining most of their flavor.
Pro Tip: While using naturally dried bay leaves in your dishes, remember they might be slightly less potent than their fresh counterparts. Adjust quantities accordingly in your recipes.
Related article: How to Store Tea at Home and Keep Its Quality and Freshness
6. The No-No’s of Bay Leaf Storage
- Avoid Moisture: Excess moisture is the enemy. It can lead to mold and a quick deterioration of your leaves.
- Keep It Cool: Bay leaves love cool, dark places. Avoid storing them near stoves or ovens.
7. Using Your Stored Bay Leaves
Remember, fresh bay leaves are more potent than dried ones. When using them in recipes, you might want to adjust the quantity. And always remove the bay leaf before serving – it’s for flavor, not munching!
Conclusion Storing fresh bay leaves isn’t rocket science, but a few expert tips can ensure you get the most out of these aromatic wonders. Whether you’re a seasoned gardener or a newbie in the kitchen, proper storage can make all the difference. Happy cooking! 🍲
For more gardening tips, make sure to subscribe to our free weekly newsletter and follow us on our socials: