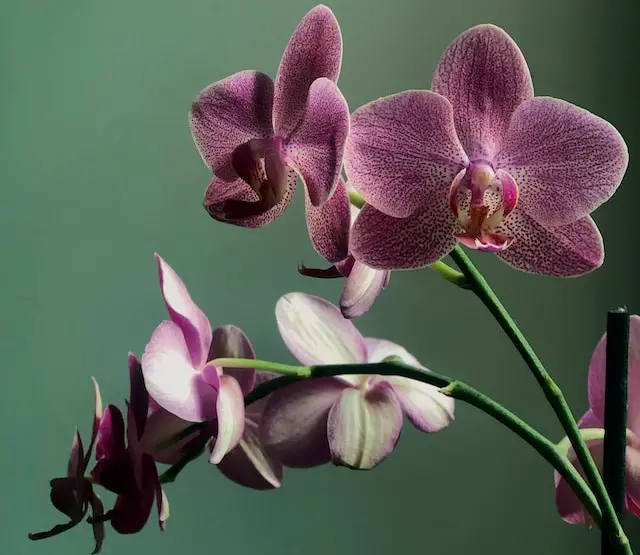
Orchids are beautiful and delicate plants that require special care, especially after they bloom. Many people mistakenly believe that once an orchid’s flowers fade, the plant is dying or dead. However, with the right care, your orchid can continue to thrive and even rebloom in the future.
In this tutorial, we will guide you through the essential steps to take care of your orchids after they bloom.
1. Enjoy the Blooms
Before diving into post-bloom care, take a moment to appreciate the beauty of your orchid’s blooms. Orchids come in a variety of colors and shapes, and their flowers can last for several weeks or even months. Enjoy this stage and take pictures to capture the memories.
2. Remove the Spent Flowers
Once the flowers start to fade and wilt, it’s time to remove them. Use clean and sharp scissors or pruning shears to carefully cut the stem just above the first node below the spent flowers. This will encourage the orchid to redirect its energy towards new growth instead of wasting it on dying flowers.
3. Assess the Health of the Orchid
After removing the spent flowers, take a closer look at the overall health of your orchid. Check the leaves, roots, and pseudobulbs (if applicable) for any signs of disease or damage. Healthy orchids have firm, green leaves, and plump roots. If you notice any issues, such as yellowing leaves or mushy roots, it’s important to address them promptly.
You can check this article here to learn more about the most common diseases orchids are prone to Most Common Orchids Diseases & How to Treat Them.
4. Adjust the Care Routine
Orchids have specific care requirements, and these vary depending on the type of orchid you have. After blooming, you may need to make some adjustments to your regular care routine. Here are some general guidelines:
- Light: Provide bright, indirect light. Avoid direct sunlight, as it can burn the leaves.
- Watering: Water your orchid when the potting medium feels dry to the touch. Avoid overwatering, as it can lead to root rot.
- Fertilizing: Continue to fertilize your orchid regularly but at a reduced strength. Use a balanced orchid fertilizer according to the package instructions. If you live in a hot/ warm area, you can read this article How to Fertilize Orchids in Summer and High Temperature
- Temperature: Maintain a temperature range suitable for your specific orchid species. Most orchids prefer temperatures between 60°F (15°C) and 80°F (27°C).
To learn more about orchids and temperatures, I wrote a whole article dedicated to that, you should check it out: The Perfect Temperature and Humidity for Orchids
5. Repotting (if necessary)
If your orchid has been in the same pot for a couple of years or if you notice overcrowded roots, it may be time to repot. Repotting allows for better airflow and prevents the potting medium from breaking down. Here’s how to repot your orchid:
- Choose a pot that is slightly larger than the current one and has drainage holes.
- Prepare a well-draining orchid potting mix, such as a combination of bark, sphagnum moss, and perlite.
- Carefully remove the orchid from its old pot, gently loosening the roots if necessary.
- Inspect the roots and trim any dead or rotten ones using clean and sharp scissors.
- Place the orchid in the new pot and fill the gaps with fresh potting mix, gently pressing it down.
- Water the orchid thoroughly and allow any excess water to drain out.
6. Provide Proper Humidity
Orchids thrive in environments with high humidity. To increase humidity around your orchid, you can:
- Use a humidifier to maintain a humid atmosphere.
- Place a tray filled with water and pebbles near the plant. As the water evaporates, it creates humidity around the orchid.
- Group your orchids together. When orchids are grouped, they create a microclimate with higher humidity.
7. Be Patient
After the blooms fade, it may take some time for your orchid to rebloom. Some orchids have a natural resting period where they need a few months of reduced light and cooler temperatures to initiate blooming. Be patient and continue to provide proper care, and you may be rewarded with another round of beautiful blooms.
Read more about Orchids: Orchids Pests & Insects – Identify, Treat, & Prevent
Frequently Asked Questions
Q: How often should I water my orchid after it blooms?
A: The frequency of watering depends on various factors such as the type of orchid, potting medium, and environmental conditions. As a general rule, water your orchid when the potting medium feels dry to the touch. Avoid overwatering, as it can lead to root rot.
Q: Should I cut the flower spike after the blooms die?
A: It is recommended to cut the flower spike just above the first node below the spent flowers. This helps the orchid redirect its energy towards new growth.
Q: How do I know if my orchid needs to be repotted?
A: If your orchid has been in the same pot for a couple of years or if you notice overcrowded roots, it may be time to repot. Additionally, if the potting medium breaks down or retains too much moisture, repotting is necessary.
Q: Can I place my orchid near a window with direct sunlight?
A: Orchids prefer bright, indirect light. Direct sunlight can burn the leaves, so it’s best to place your orchid near a window with filtered light or use sheer curtains to diffuse the sunlight.
Conclusion
Taking care of orchids after they bloom is crucial for their long-term health and future blooming. By following the steps outlined in this tutorial, you can ensure that your orchids receive the proper care they need. Remember to enjoy the blooming stage, remove spent flowers, assess the plant’s health, adjust the care routine, repot if necessary, provide proper humidity, and be patient. With a little love and attention, your orchids will continue to bring beauty and joy into your home for years to come.